Settings
This chapter describes the different settings available in the TimePunch Watcher.
Recording Settings
Via the menu “Time tracking settings” in the TimePunch Watcher, users can access the configuration page where the behavior of time recording can be adjusted.
After selecting the menu item, the following page will be opened:

Start and stop time recording automatically
Time recording starts automatically when the Watcher is launched and stops when the Watcher is closed.
If this option is enabled, time recording starts immediately after the user logs on to the PC. In this case, the project from the previous day is used automatically.
Additionally, time recording will be stopped automatically when the TimePunch Watcher is closed.
Recording Mode
TimePunch supports three different recording modes.

Full-fledged time recording with break mode
In this mode, users can start or change projects and either stop the recording or explicitly take a break.

Simplified start/stop time recording
With the simplified start/stop mode, users can switch projects or stop and restart the recording.
Breaks are recorded implicitly by stopping and restarting the time recording.

Automatic time recording with project selection only
This is the simplest recording mode. Users can only select and start projects.
Manual pauses or stopping the recording are not possible.
Automatic breaks (e.g. when the screen saver is activated) are still recorded.
This mode prevents accidental recording gaps by ensuring uninterrupted time tracking.

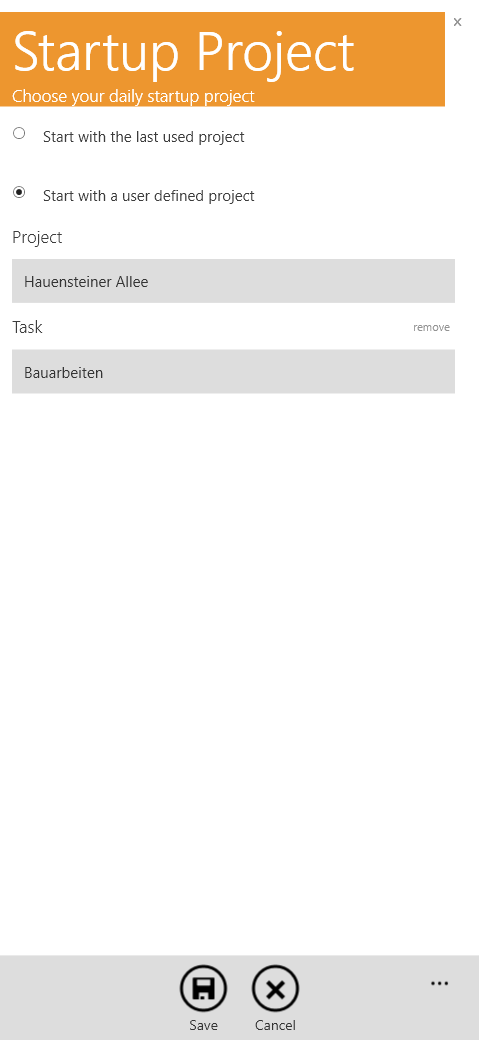
Start Project
This option defines the start project used for the first time recording of the day.
The start project can either be determined dynamically based on the most recently used project or be defined manually using a fixed project/task combination.
Recording Precision
This setting defines how start and end times are rounded.
By default, a rounding precision of 1 minute is applied.
Depending on company policies, this value can be increased (e.g. to 5 minutes).
Remind for project update
If enabled, TimePunch periodically reminds users to review and confirm the currently recorded project.
This can be helpful in busy work environments where project changes may otherwise be overlooked.
After locking Windows
This setting defines how TimePunch reacts when Windows is locked.
Available options:
Pause time recording
TimePunch immediately starts a break recording when Windows is locked.
After unlocking, recording continues with the previous project.Ignore absence for 5 to 30 minutes
TimePunch continues recording until the defined time span is exceeded.
If the user logs in again within this time frame, no break is recorded.
If the PC remains locked longer, the entire period is recorded as break time.Do not pause time recording
Even when Windows is locked, time continues to be recorded as working time.
A break is only recorded if the user manually pauses or stops recording.
Regardless of the selected option:
If Windows remains locked for more than 6 hours, the time recording is automatically closed at the lock time.
Note:
The screen saver can also lock the PC. With this setting, an activated screen saver can automatically trigger a break recording once the configured limit is exceeded.
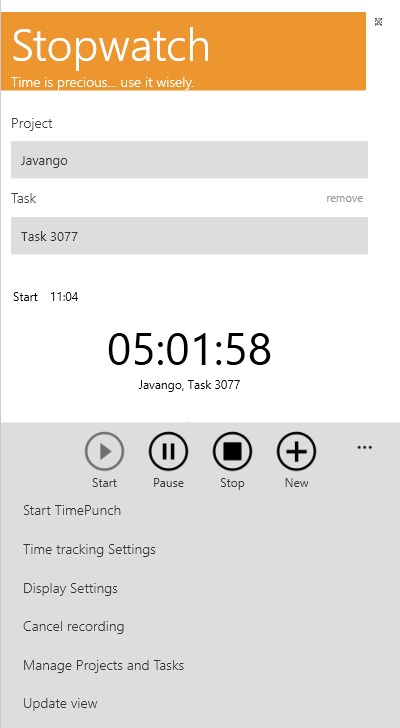
Display Settings
Using the menu “Display Settings”, users can configure the appearance and behavior of the TimePunch Watcher.
After selecting the menu item, the following page will be displayed:
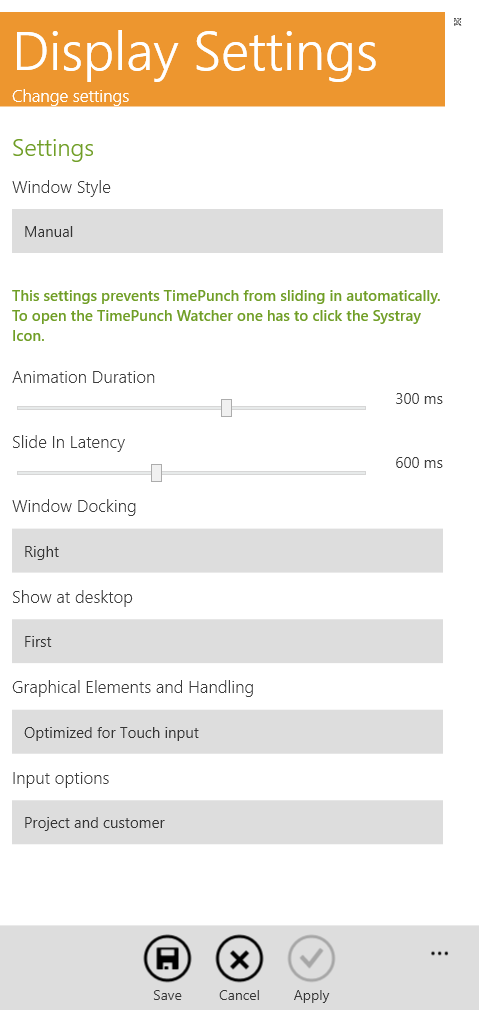
Window Style
The window style defines how the main window of the TimePunch Watcher behaves.
Available options:
Hidden
The Watcher is completely collapsed.
It becomes visible again when the mouse is moved to the screen edge and remains there for the configured delay.
Clicking outside the Watcher hides it again.Touch friendly
The Watcher remains slightly visible (approx. 5 mm) at the screen edge, making it easy to reopen via touch.Visible
The Watcher is always visible on the screen.
This is ideal for setups with multiple monitors.Manual
The Watcher does not open automatically.
Users must open it manually via the system tray icon.Invisible
The Watcher is not shown at all.
It can only be reopened by starting the Watcher twice via the Windows Start Menu.Hint:
This mode is intended to be used in combination with
“Time recording starts automatically when the Watcher is launched and stops when the Watcher is closed”.
In this configuration, TimePunch records working time fully automatically without showing the Watcher UI.
TimePunch Watcher Icon
This setting controls the visibility of the TimePunch Watcher icon.
Show in task bar
The Watcher appears in the Windows task bar alongside other applications.Show in system tray
The Watcher appears in the Windows system tray.
Clicking the icon opens the Watcher window.Do not show icon
The Watcher icon is hidden completely (neither task bar nor system tray).
Window Docking & Desktop Visibility
These settings define where and how the TimePunch Watcher is positioned on the screen.
UI Element Control
This option specifies whether UI elements such as date, time, and duration selectors are optimized for touch screen usage.
Input Options
Here, users can define which fields are displayed in the stopwatch view during time recording.
Tip:
To keep the interface simple, display only frequently required fields.
Additional information can always be added later in the time entry dialog.